
Migrating a .ova virtual appliance image into Proxmox is a straightforward process
- First step involves transferring the
.ovafile to a temporary directory on your Proxmox server. I use scp to securely transfer files on to my proxmox host’s/tmpdirectory
# Where pve is the proxmox host
scp image-vmware.ova root@pve:/tmp/
- Now remotely connect to your Proxmox server using
ssh
# Where pve is the proxmox host
ssh root@pve
- Extract the
.ovafile using thetarcommand to get access to the disk image file. In my example i have a.ovafiles namedcqai-appliance-airgapped-6.12.8-0072c213.ova
pushd /tmp/
tar xvf cqai-appliance-airgapped-6.12.8-0072c213.ova

tar xvf cqai-appliance-airgapped-6.12.8-0072c213.ova
cqai-appliance-airgapped-6.12.8-0072c213.ovf
cqai-appliance-airgapped-6.12.8-0072c213.mf
cqai-appliance-airgapped-6.12.8-0072c213-disk1.vmdk
- Now we can import the ovf file into proxhost using the
qm importovfcommand
# qm importovf <unused vmid> <path to ova> <destination storage pool name> [OPTIONS]

qm importovf 100 ./cqai-appliance-airgapped-6.12.8-0072c213.ovf  SDETHIN --format qcow2
  Logical volume "vm-100-disk-0" created.
transferred 0.0 B of 100.0 GiB (0.00%)
transferred 1.0 GiB of 100.0 GiB (1.00%)
transferred 2.0 GiB of 100.0 GiB (2.00%)
transferred 3.0 GiB of 100.0 GiB (3.00%)
...etc
transferred 99.0 GiB of 100.0 GiB (99.03%)
transferred 100.0 GiB of 100.0 GiB (100.00%)
transferred 100.0 GiB of 100.0 GiB (100.00%)
- Next we need to import the
vmdk(Virtual Machine Disk) to the Virtual Machine, created in the last step. Check the VM Number usingqm listor in the web GUI. In my example, the VM Number is100so I will use below command
To view a list of KVMs:
qm list

 # Example output
      VMID NAME                 STATUS     MEM(MB)    BOOTDISK(GB) PID
       100 cqai-appliance-airgapped-6.12.8-0072c213 running    32768              0.00 75310
       # etc...
To Import the virtual disk into your Virtual Machine :
# qm importdisk <vmid> <path to vmdk> <destination storage pool name> [OPTIONS]
qm importdisk 100 cqai-appliance-airgapped-6.12.8-0072c213-disk1.vmdk SDETHIN -format qcow2
importing disk 'cqai-appliance-airgapped-6.12.8-0072c213-disk1.vmdk' to VM 100 ...
  Logical volume "vm-100-disk-1" created.
transferred 0.0 B of 100.0 GiB (0.00%)
transferred 1.0 GiB of 100.0 GiB (1.00%)
transferred 2.0 GiB of 100.0 GiB (2.00%)
transferred 3.0 GiB of 100.0 GiB (3.00%)
transferred 4.0 GiB of 100.0 GiB (4.00%)
...etc
transferred 99.0 GiB of 100.0 GiB (99.03%)
transferred 100.0 GiB of 100.0 GiB (100.00%)
transferred 100.0 GiB of 100.0 GiB (100.00%)
Note: Both qm commands for importing the ovf and vmdk, I chose the qcow2 storage format for the virtual disks. “QCOW” represents QEMU’s copy-on-write mechanism. The QCOW2 format separates the physical storage layer from the virtual layer, introducing a mapping system between logical and physical blocks.
- To best understand this step, it’s recommended to access the Proxmox WebGUI: Notice that while the disk is listed as part of the Virtual Machine, it hasn’t been actually added or attached to the VM yet.
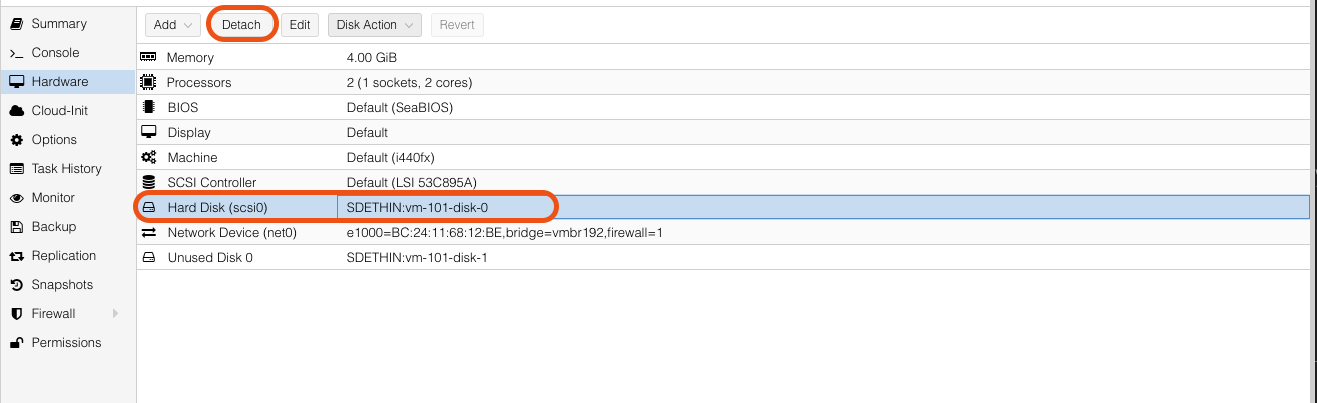
- We can delete the default disk that was automatically created.
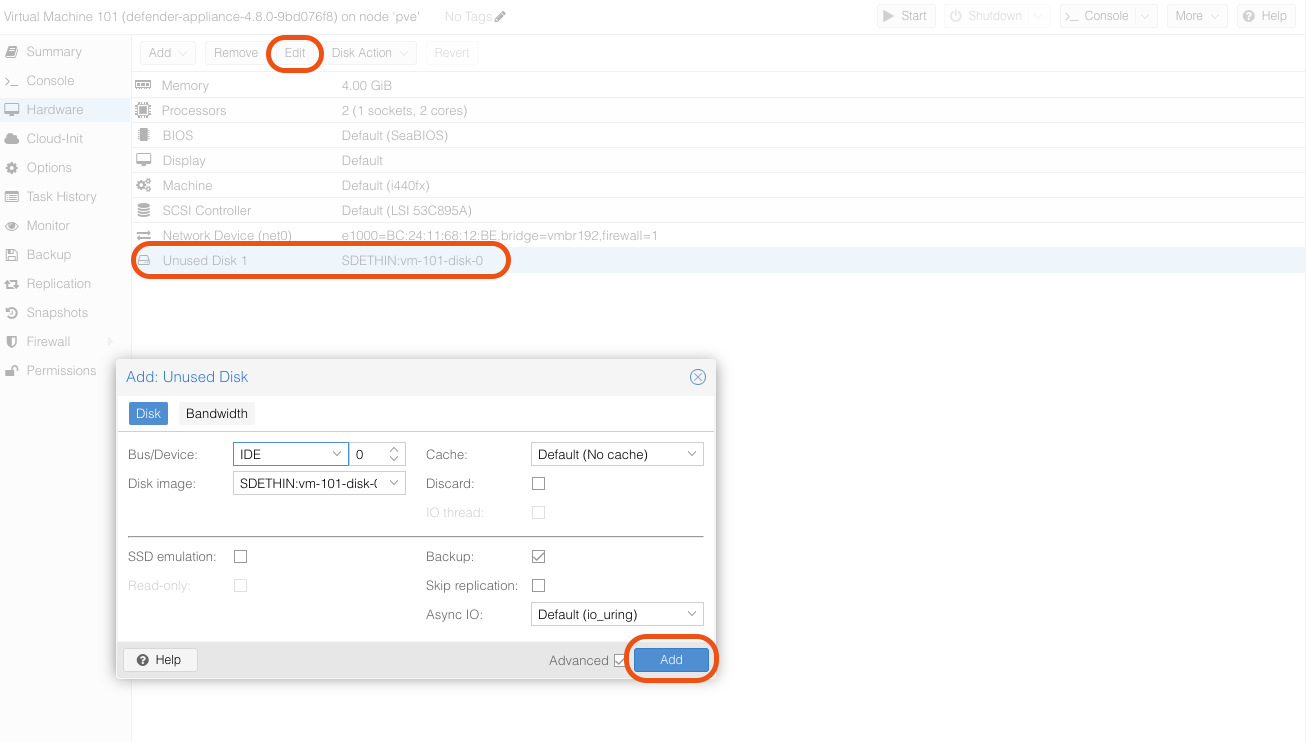
- Finally, we can attach the added imported disk
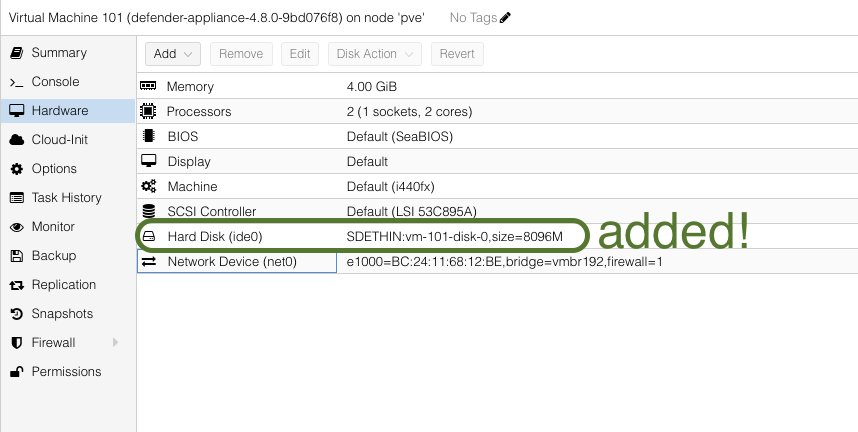
The OVA import and setup process is now finished. After making any additional adjustments, such as configuring system resources, you can turn on the virtual machine and start our work.